Serve Your Rails App Over SSL in Development Mode
May 2024
Serving your application over SSL in production is a minimum requirement in 2024, but testing your configuration locally can be a pain. Here’s how you can test SSL locally without using external dependencies or “doing it live”.
Generate Your Certificate Bundle
When first researching a solution, I found this answer on StackOverflow (archived) that went into great detail about how to create a Certificate Authority that can then be used to generate multiple SSL certificates. The general approach is:
- Generate a private Certificate Authority (CA)
- Generate a Certificate Signing Request (CSR) using the Common Name of the hostname you will be serving over SSL
- Generate a certificate that is signed by the private CA along with an accompanying private key
Rather than copy/pasting these commands into a terminal session each time you want to generate a new SSL certificate, you can automate them with a parameterized Rake task. Invoke it with the desired CN (hostname) of your server:
rails "cert:generate[host.example]"
When first invoked it will create the CA certificate, but subsequent invocations
will skip this step and just generate the necessary certificate files. Your
config/certs directory will now look like:
$ tree config/certs
config/certs
├── host.example.crt <-- Server SSL certificate
├── host.example.csr <-- CSR file (ignore)
├── host.example.key <-- Private key for server certificate
├── root-ca.crt      <-- Root CA certificate (install in certificate store)
├── root-ca.key      <-- Root CA private key
└── root-ca.srl      <-- Certificate serial number store

1 directory, 6 files
Configure Hostname Resolution
Whichever hostname you pick, you’ll need to ensure it’s resolvable. The easiest
way to do this is to add it to your local /etc/hosts file:
echo "127.0.0.1 host.example" | sudo tee -a /etc/hosts
Repeat this for each hostname you want to resolve, but keep in mind that if you
shadow a publicly-resolvable hostname you’ll want to remove it from /etc/hosts
later to prevent conflicts when you go to production.
Configure Your Rails Application
Before you can connect to your server, you’ll need to whitelist the hostname to prevent the host authorization middleware from blocking your requests. You can do this by adding the hostname to the approved list:
# config/environments/development.rb
Rails.application.configure do
  config.hosts << 'host.example'
end
Or just disable the check if you’re using multiple hostnames:
# config/environments/development.rb
Rails.application.configure do
  config.hosts = []
end
Scoping this configuration to the
developmentenvironment ensures you won’t accidentally open your production environment toHostheader attacks
A common reason for running HTTPS locally is to confirm that Rails’s
force_ssl option is working as expected, so go ahead and
configure that too:
# config/environments/development.rb
Rails.application.configure do
  config.force_ssl = ENV['FORCE_SSL'].present?
end
Start the Rails Server
When you ran the cert:generate task, it provided some helpful output:
Files needed for configuration:

             Root CA: /path/to/config/certs/root-ca.crt (add to your browser certs)
  Server Certificate: /path/to/config/certs/host.example.crt
          Server Key: /path/to/config/certs/host.example.key

Run your server in SSL mode:

  sudo rails server -b 'ssl://host.example:443?key=/path/to/config/certs/host.example.key&cert=/path/to/config/certs/host.example.crt'
The
--bindingoption (aliased as-b) allows us to specify a custom binding other than the default of127.0.0.1:3000. In this case we are binding to port443and providing the necessary certificate details. The use ofsudois required because we are binding to a privileged port.
Once the server is started in SSL mode, fire up another Rails server on port
80 to test the force_ssl redirect configuration:
FORCE_SSL=1 sudo -E rails server -b 'host.example' -p 80 -P tmp/pids/server-http.pid
The use of
-Eensures theFORCE_SSLenvironment variable will be passed to therails servercommand, and the the--pidoption (aliased as-P) will permit two Rails processes to track their PIDs separately instead of using the defaulttmp/pids/server.pid
Now that we’ve simulated a common redirect scenario, we can use cURL to ensure everything works correctly.
Test the Connection
We’ll connect to the health check route that ships with modern versions of Rails, but since we’re using a private CA to sign our server certificate we’ll need to provide that PEM-encoded certificate to allow cURL to trust our server certificate:
curl \
  --include \
  --location \
  --cacert config/certs/root-ca.crt \
  http://host.example/up
Using this command, we should see a 301 redirect and the resulting status
served over SSL:
HTTP/1.1 301 Moved Permanently
content-type: text/html; charset=utf-8
location: https://host.example/up
Content-Length: 0

HTTP/1.1 200 OK
x-frame-options: SAMEORIGIN
x-xss-protection: 0
x-content-type-options: nosniff
x-permitted-cross-domain-policies: none
referrer-policy: strict-origin-when-cross-origin
content-type: text/html; charset=utf-8
vary: Accept
etag: W/"7e6c9877b2dec7dfadc43e742246d94d"
cache-control: max-age=0, private, must-revalidate
x-request-id: ad037646-fe4f-44a0-9454-0461908e06e4
x-runtime: 0.010109
server-timing: start_processing.action_controller;dur=0.01, render_template.action_view;dur=0.01, process_action.action_controller;dur=0.87
Content-Length: 73

<!DOCTYPE html><html><body style="background-color: green"></body></html>
Success!
Trust Your CA Certificate
If you’re connecting to your server using cURL, it’s annoying to have to provide
the --cacert option with every invocation, and if you’re connecting via a
browser, your requests may get rejected due to the default security policy. If
you’re on macOS, there are a couple of steps you need to take to ensure the
private CA cert we created is trusted in Firefox, Safari, Chrome, and cURL:
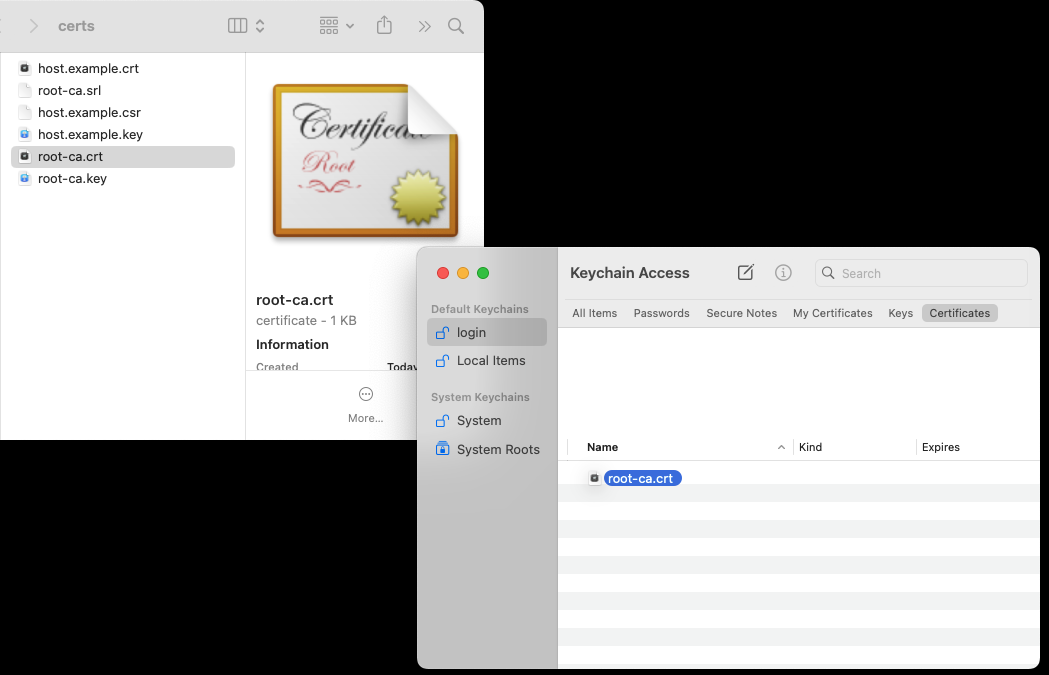
-
Open Keychain Access and add the CA certificate to your “login” keychain by dragging and dropping it into the “Certificates” list:
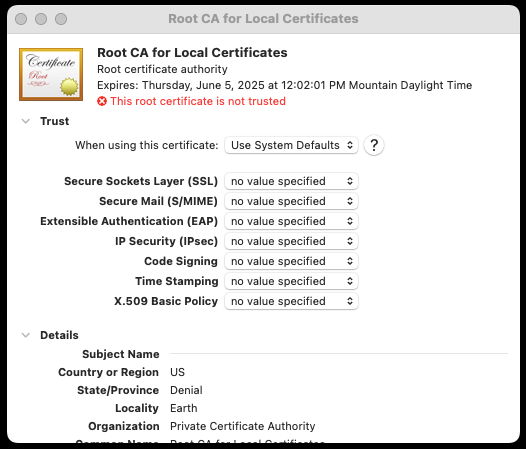
-
Double-click the certificate in the list, expand the “Trust” section, and select “Always Trust” from the drop-down (the setting will be updated when you close the detail window):
-
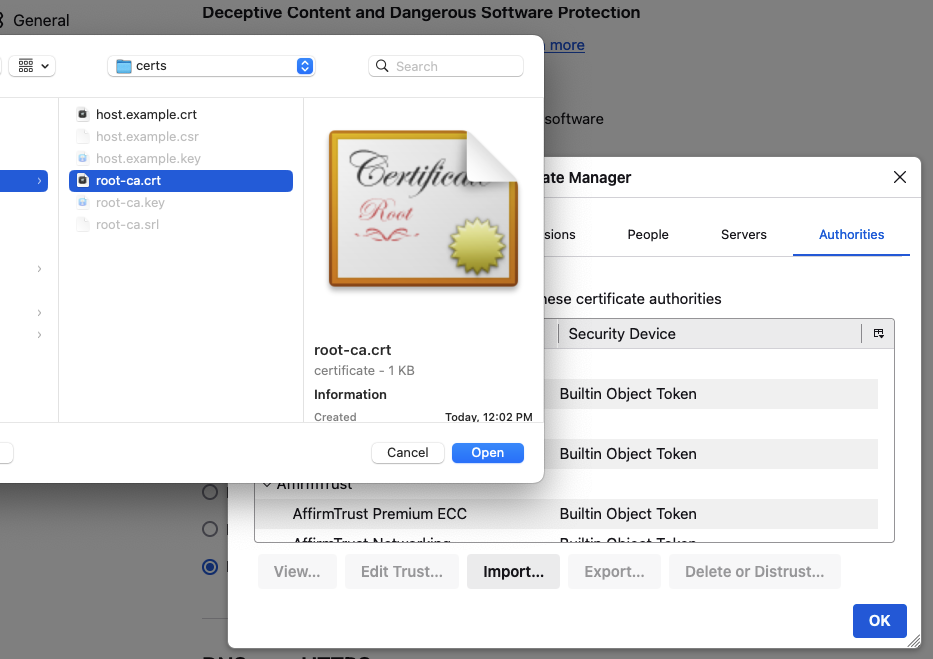
For Firefox specifically, open “Preferences > Privacy & Security > View Certificates …”, click “Import …”, and import the root CA certificate:
See this post for a deeper dive on how to configure this for Firefox
Alternatively, if you’re just using cURL, you can add your root certificate to
the local store and avoid having to use --capath all over the place. First,
find out where the store is located:
curl -v https://host.example 2>&1 | grep CAfile
*  CAfile: /etc/ssl/cert.pem
Then append the certificate to the list, making sure to keep a backup:
sudo cp /etc/ssl/cert.pem{,.bak} && cat config/certs/root-ca.crt | sudo tee -a /etc/ssl/cert.pem
Conclusion
With this streamlined setup, you can more easily test your SSL configuration and test cases where external services require callbacks to be served over a secure connection.